Faux Shiplap Wall – EASY and CHEAP and LOOKS GREAT!

Two years ago my husband and I purchased our current house. We absolutely love this house and feel incredibly blessed to call it our home. It was a brand new home. However, it was a production home so it had some upgrades but didn’t come with much trim work or custom type features.
Our goal has been to add our own custom features. We added beautiful reclaimed wood barn doors to our basement when we finished off two bedrooms down there, but the rest of the house has remained mostly untouched. We haven’t even painted one wall. So, my husband decided that he wanted to tackle a project.
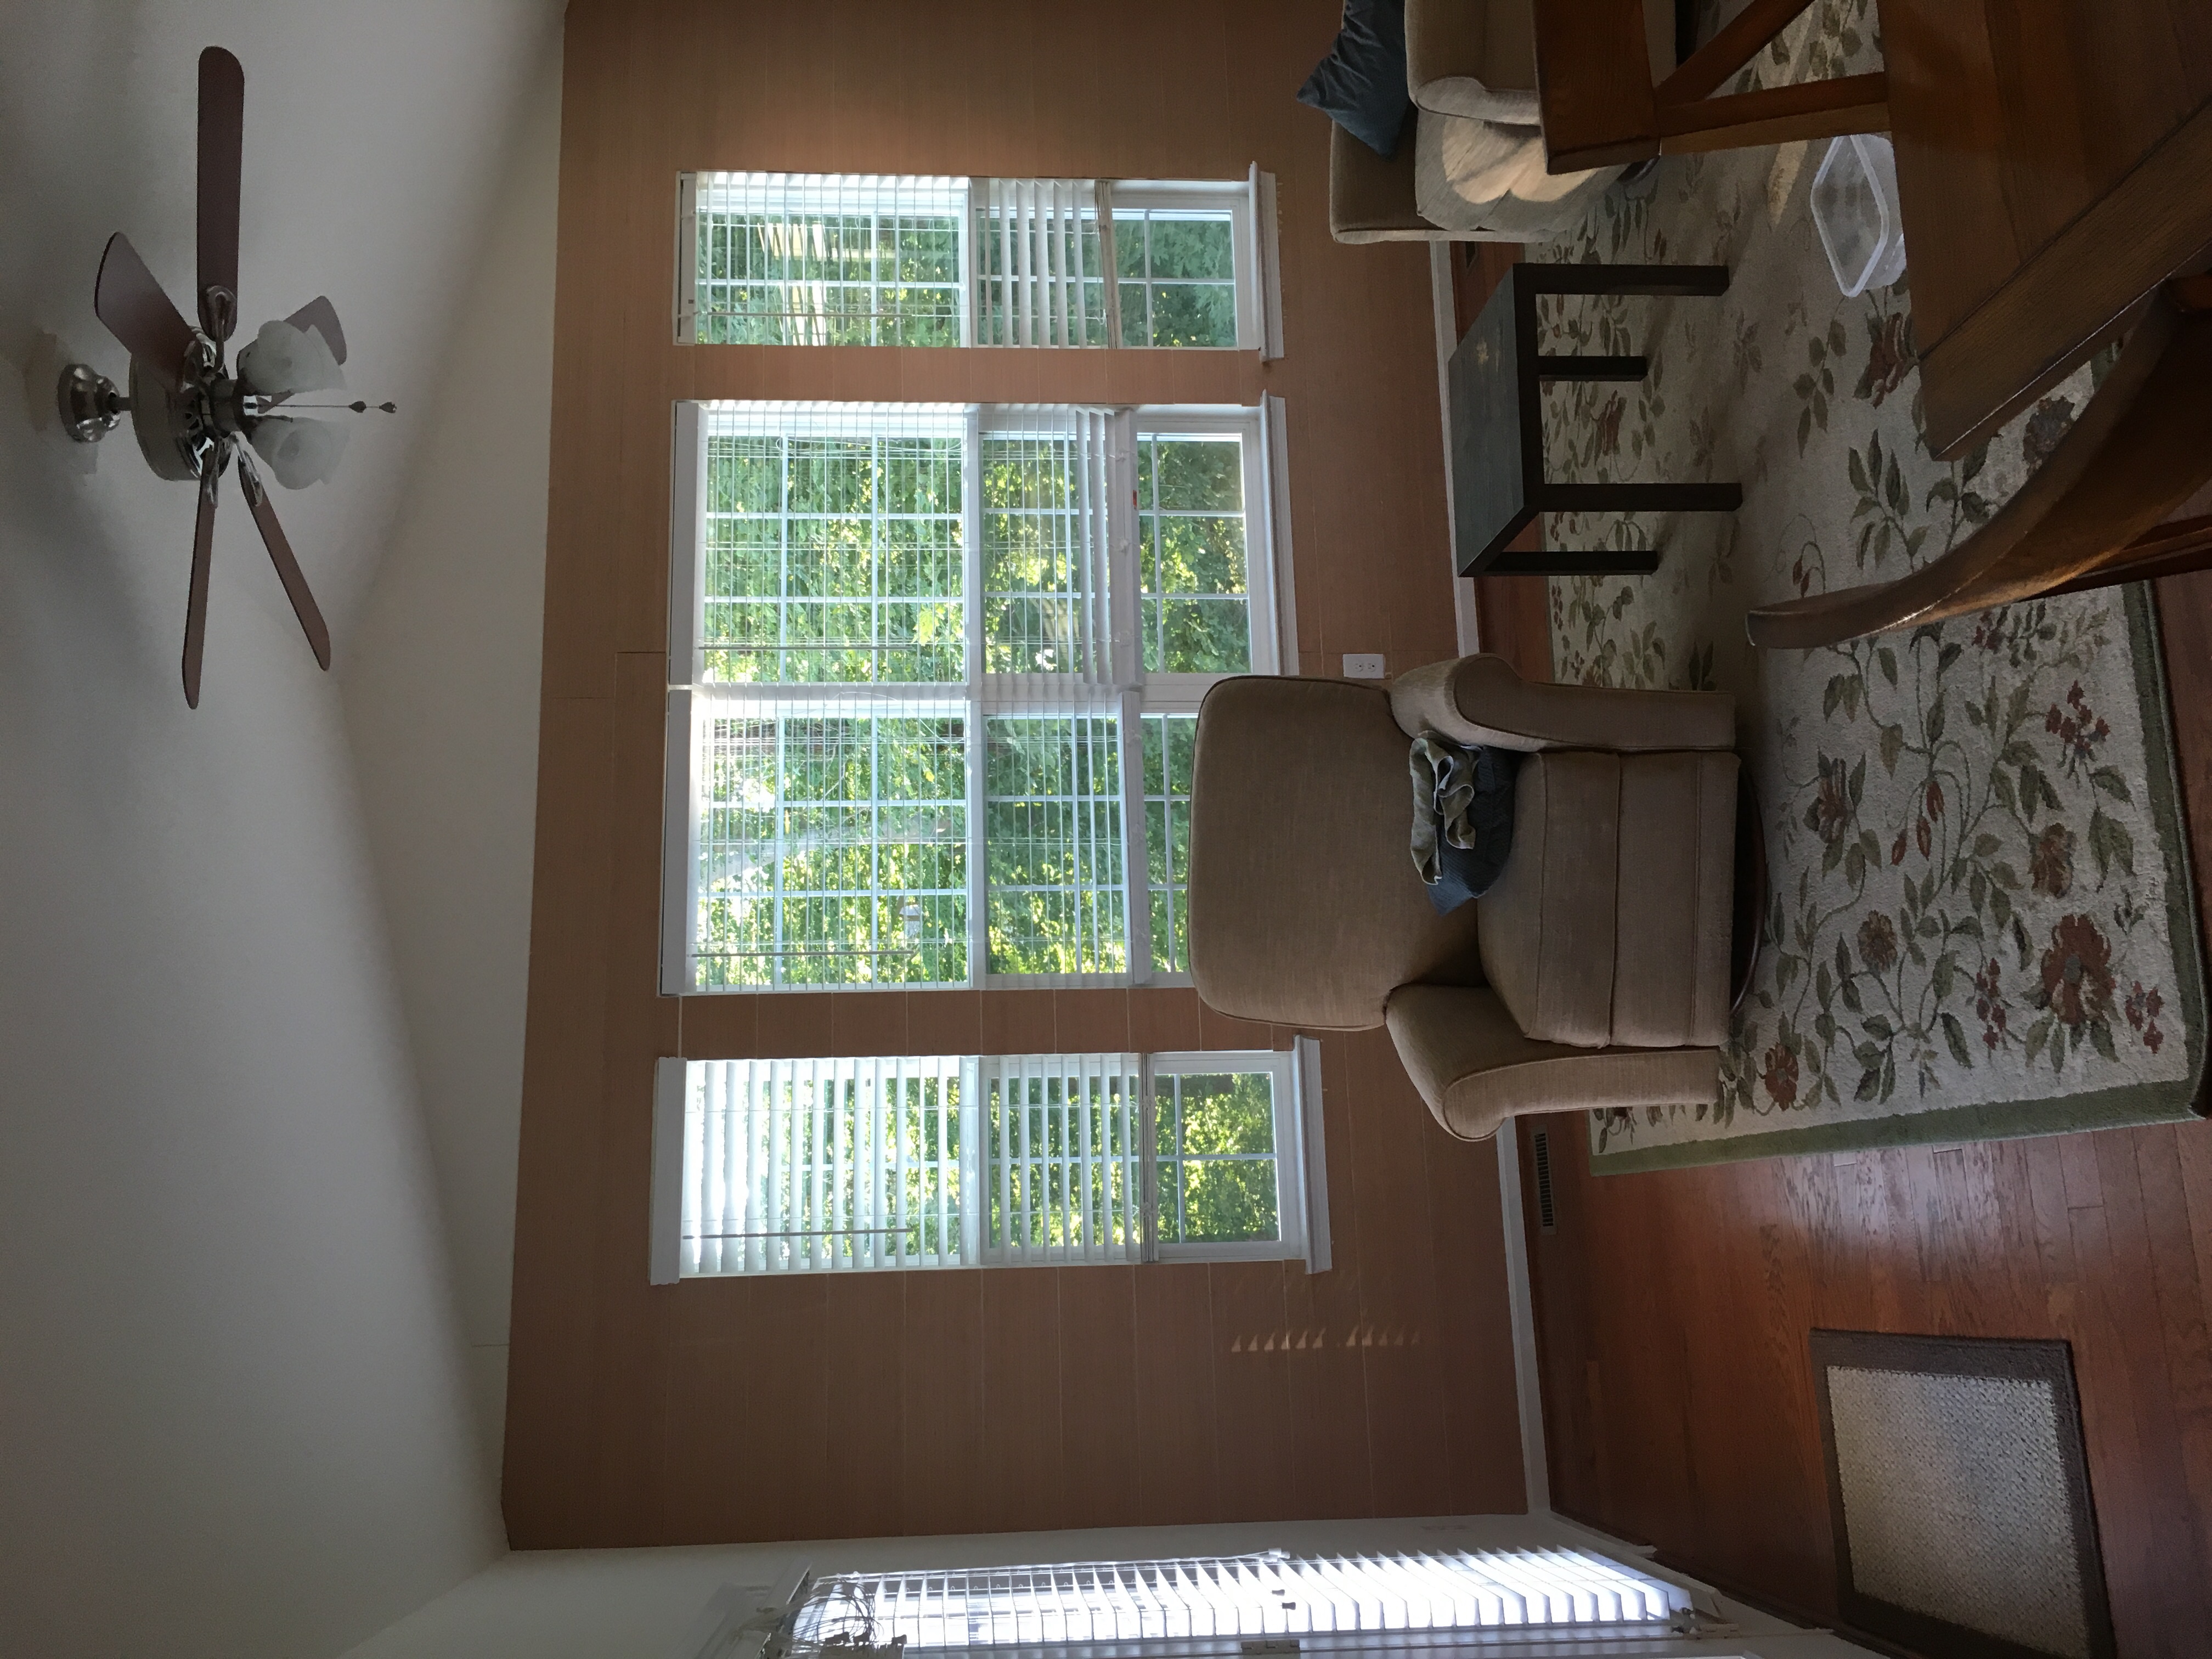
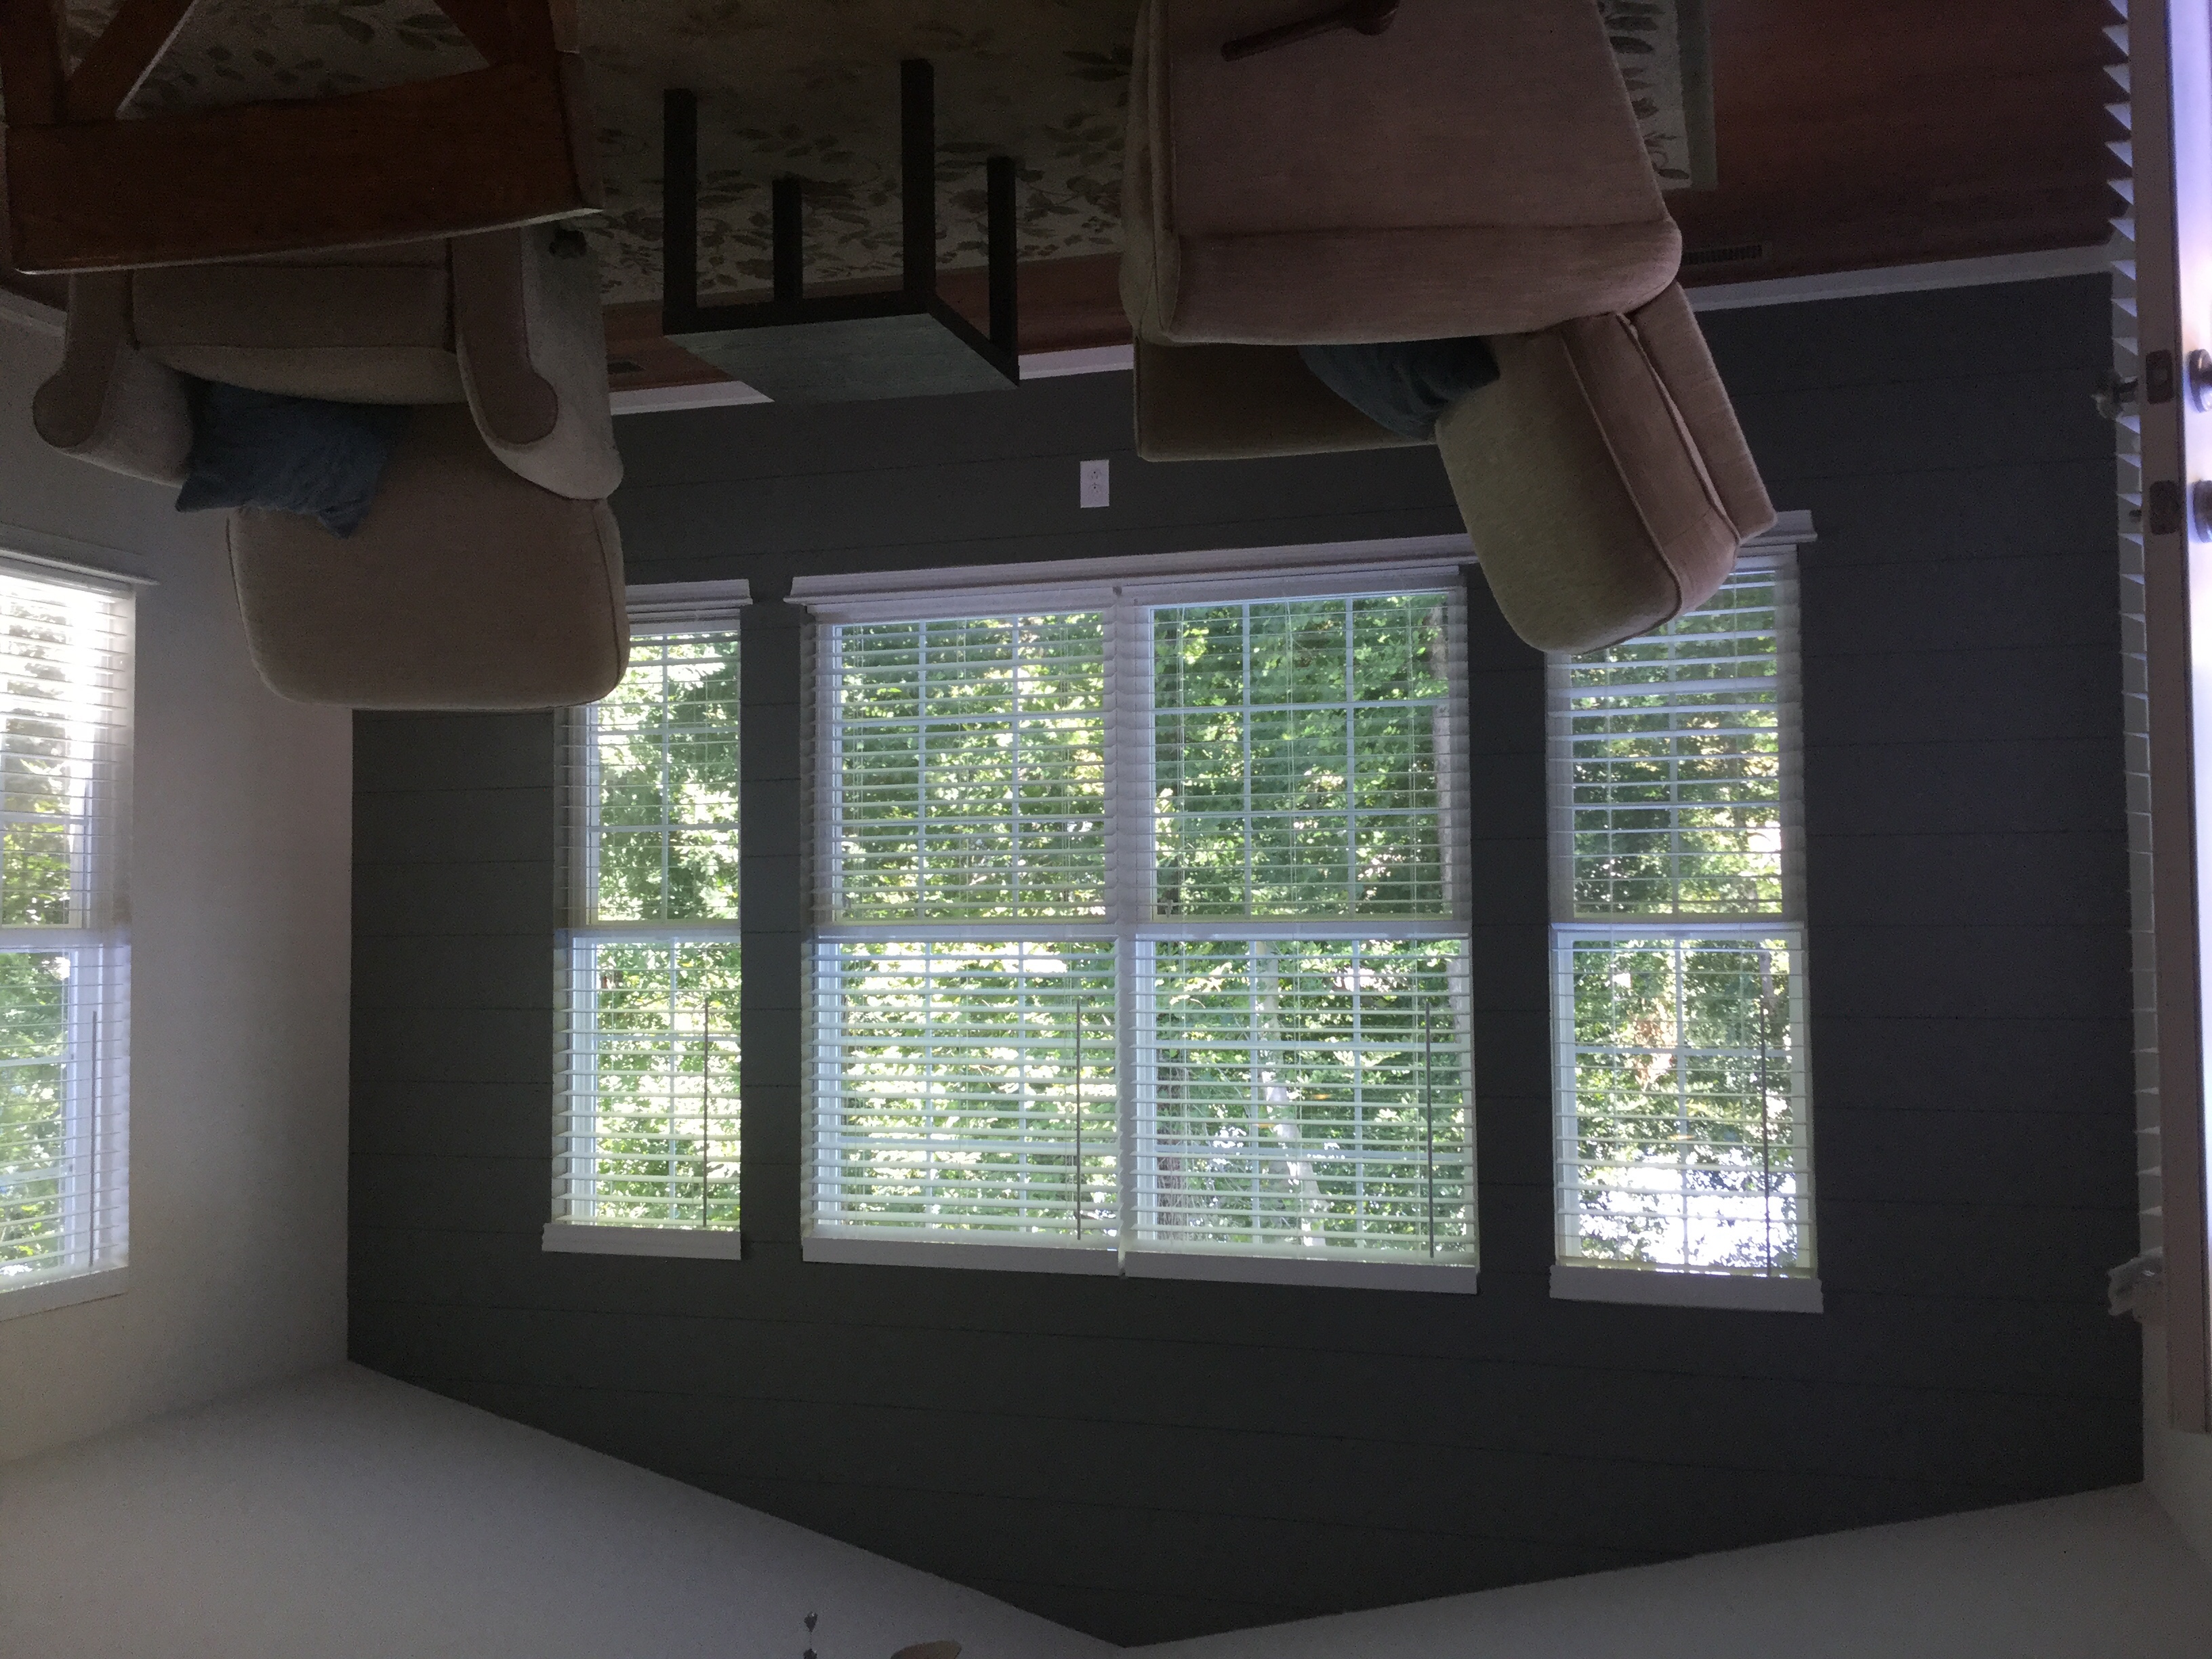
We picked out our favorite wall in our house as the wall we wanted to upgrade. It is the wall that looks out to the trees and has an vaulted ceiling we love! It is in our morning room. We placed rocking chairs in the room to create a relaxing space. We often find ourselves sitting in the chairs in the morning on weekends chatting over coffee or discussing our day after my husband returns from work in the afternoon. So, the wall seemed like the natural one to upgrade.
We considered a couple of options.
1. Reclaimed wood – this was pretty expensive and we were having a difficult time deciding on colors.
2. Laminate wood planks – also expensive and again we just couldn’t get comfortable with any of the wood colors because we had hardwood that we had to compliment but not completely match.
3. Peel & Stick vinyl “wood” planks – I actually used this in the powder room in our previous home and it turned out great. It was a cheap and easy project. Most people thought it was real wood on the wall. However, this wall was a larger wall and is a major feature wall in our home and I was afraid that the vinyl planks could look fake.
4. Faux Shiplap – This is what we settled on. I came across the idea on Pinterest and immediately knew this was the best option because 1) it is cheap, 2) we could paint it and that eliminated our issues with wood colors, and 3) it is easy to install.
So, how did I we do it?
We headed to Lowes to pick up the supplies:
- Plywood Underlayment (this comes in 4′ X 8′ boards) – we had them cut the boards into 8″ wide boards at Lowes.
- Nail gun with 1 1/2″ to 2″ brads
- Sandpaper and sander power tool
- Quarters and tape (these are your spacers)
- Jigsaw
- Table saw
- Stud Finder
- Paint
Overall, the supplies were cheap except that we had to buy a nail gun and jigsaw. We already had a table saw. If you have the appropriate tools on hand, you only need to purchase the brads, plywood, and paint which really isn’t too bad.
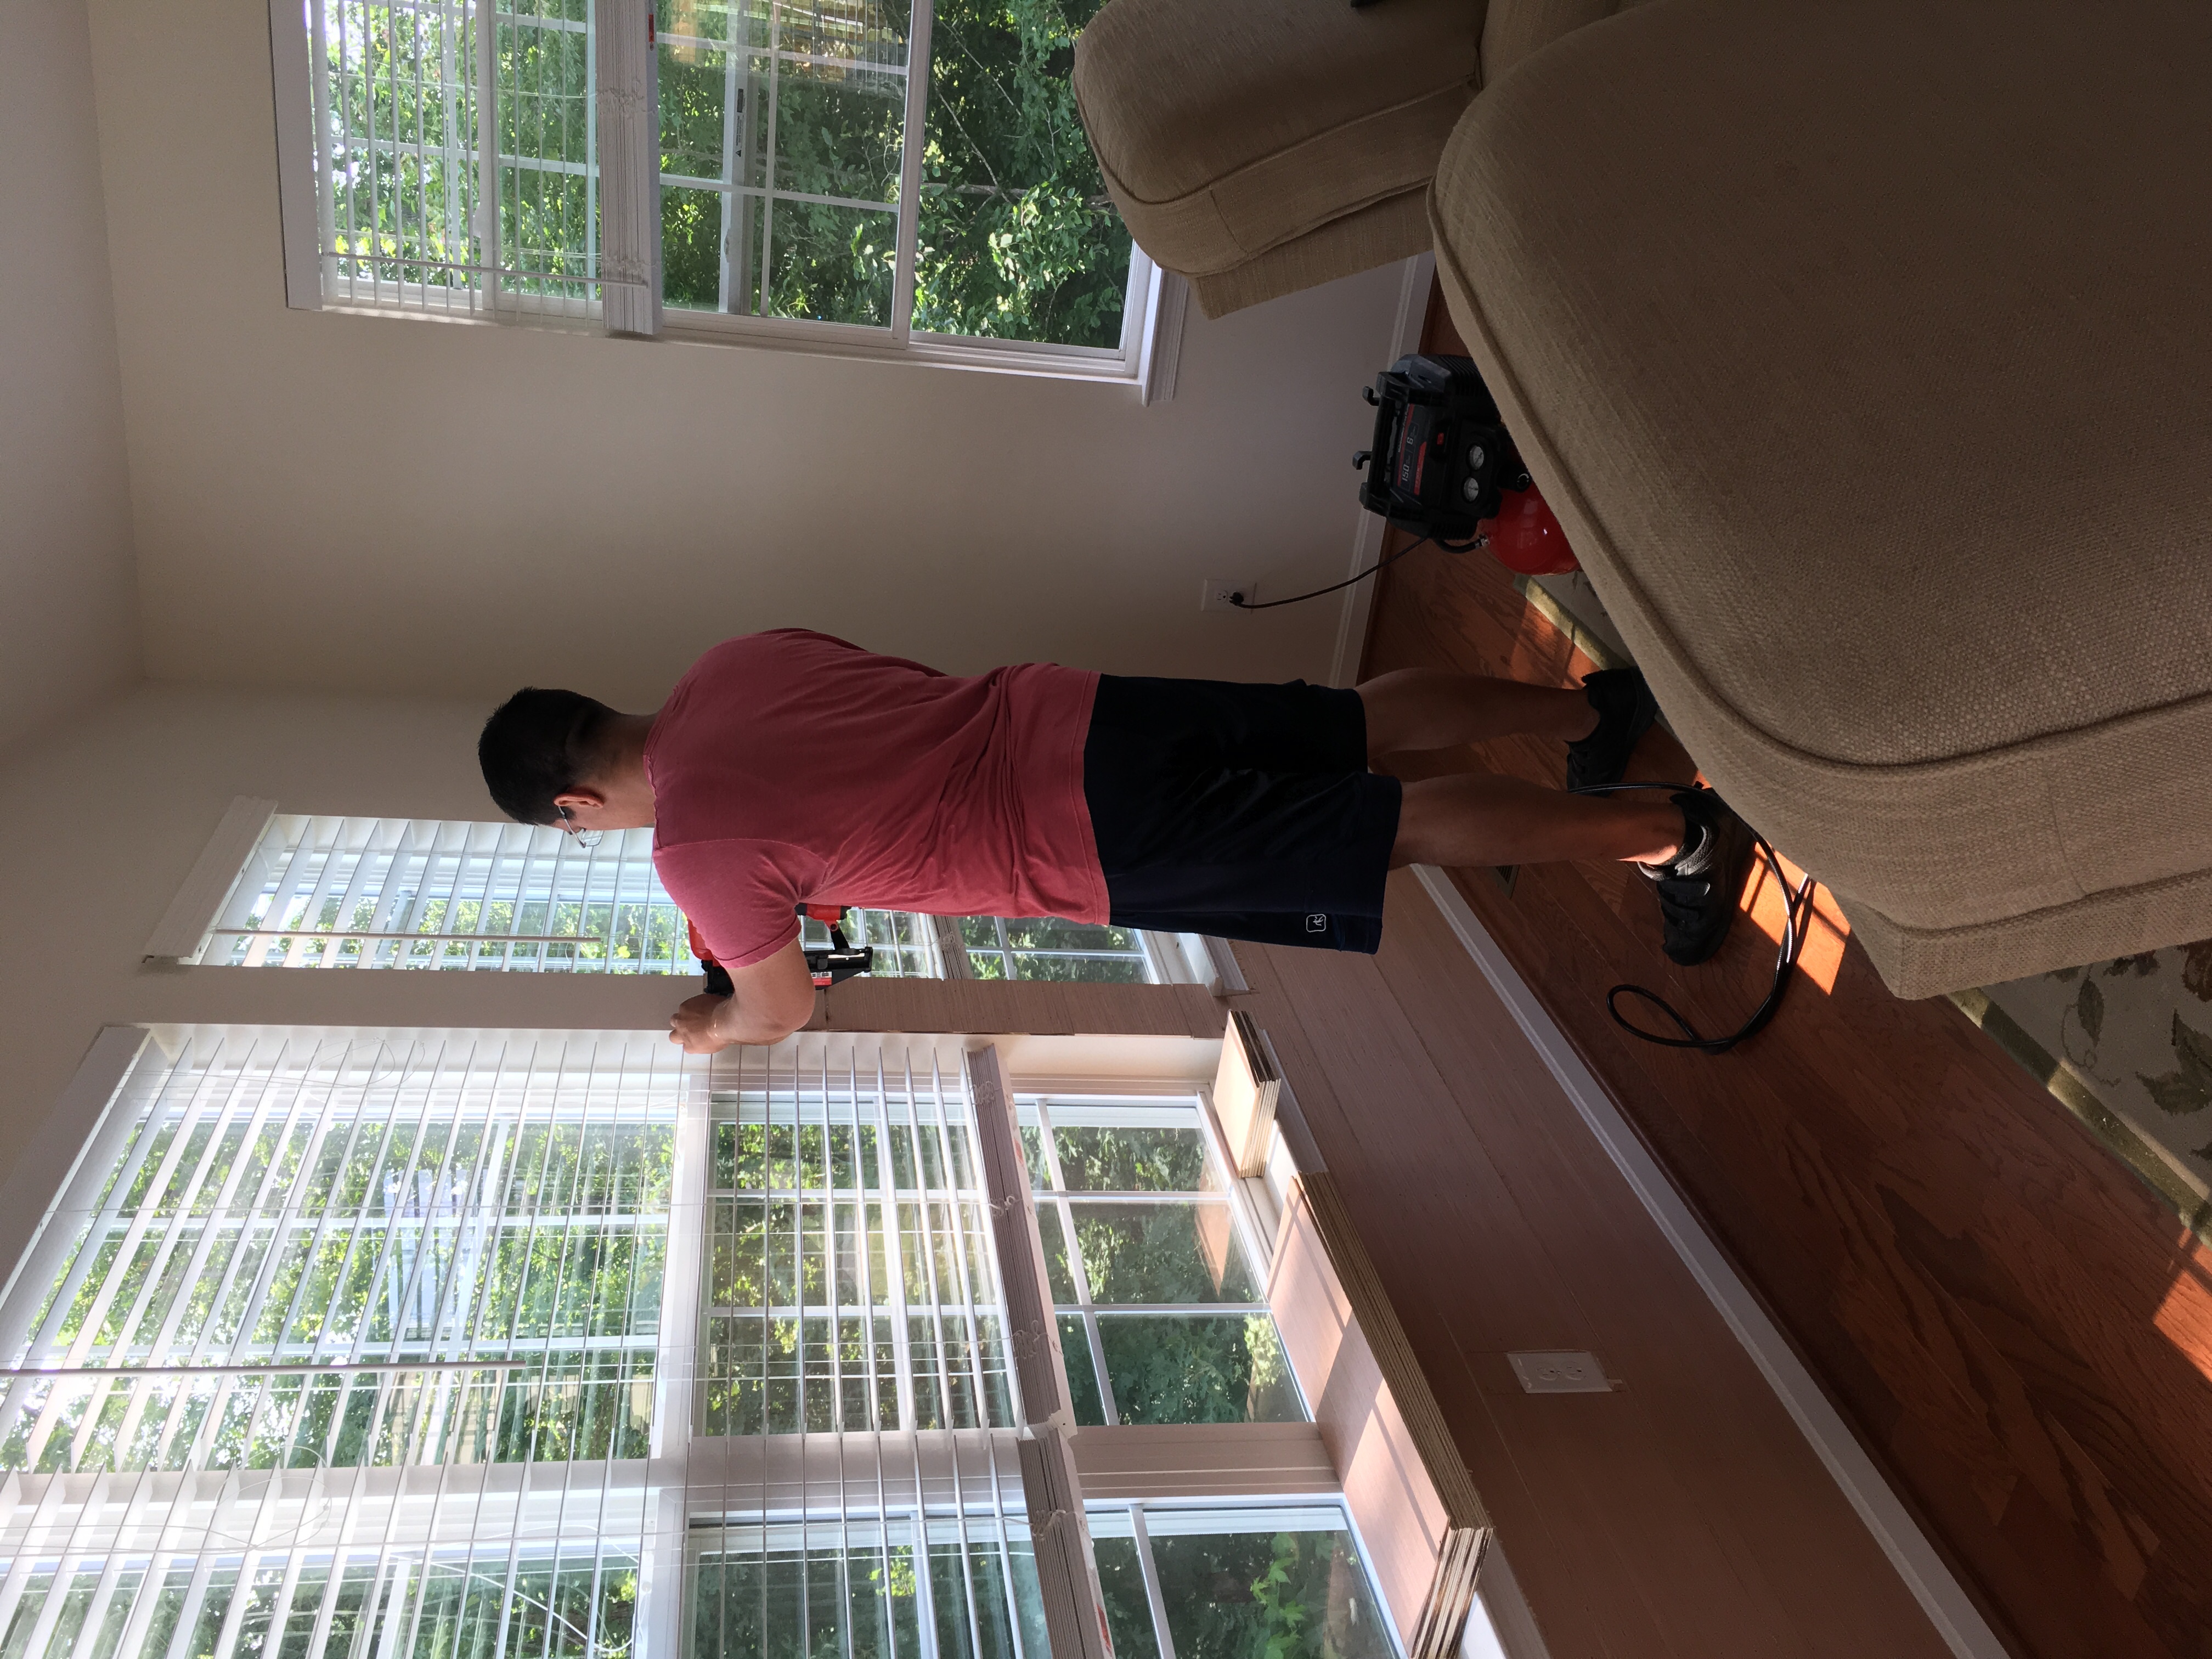
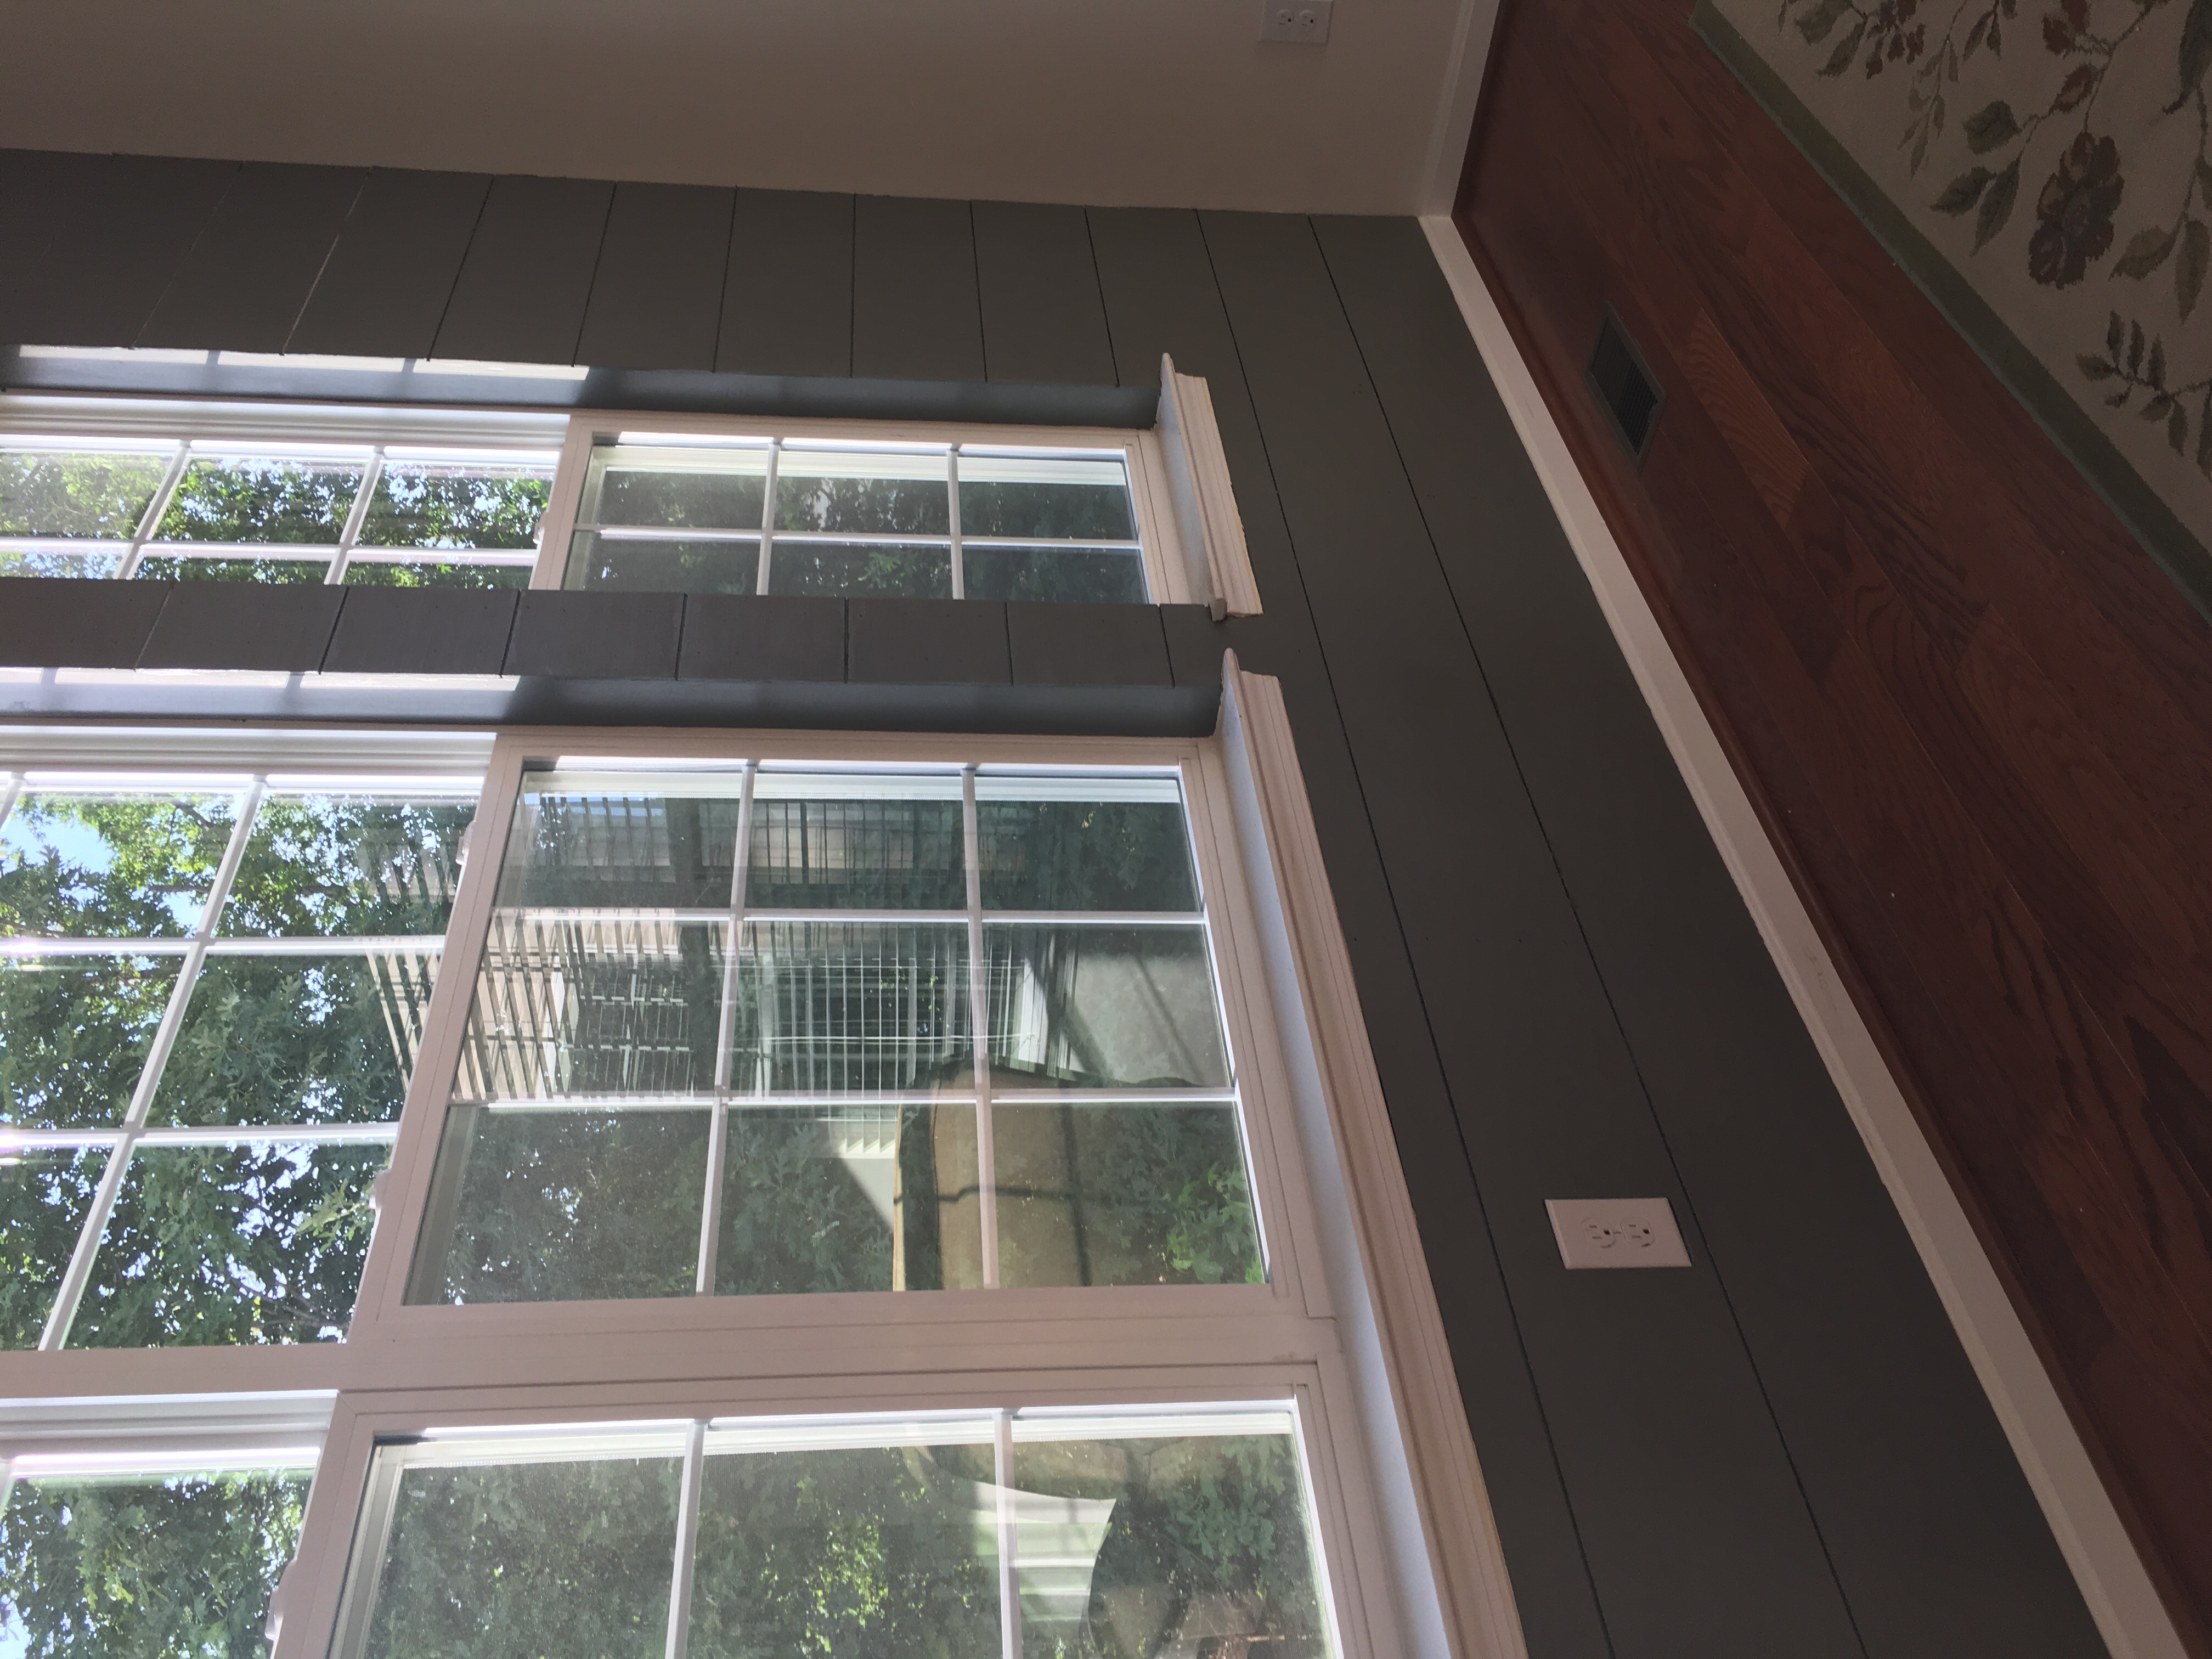
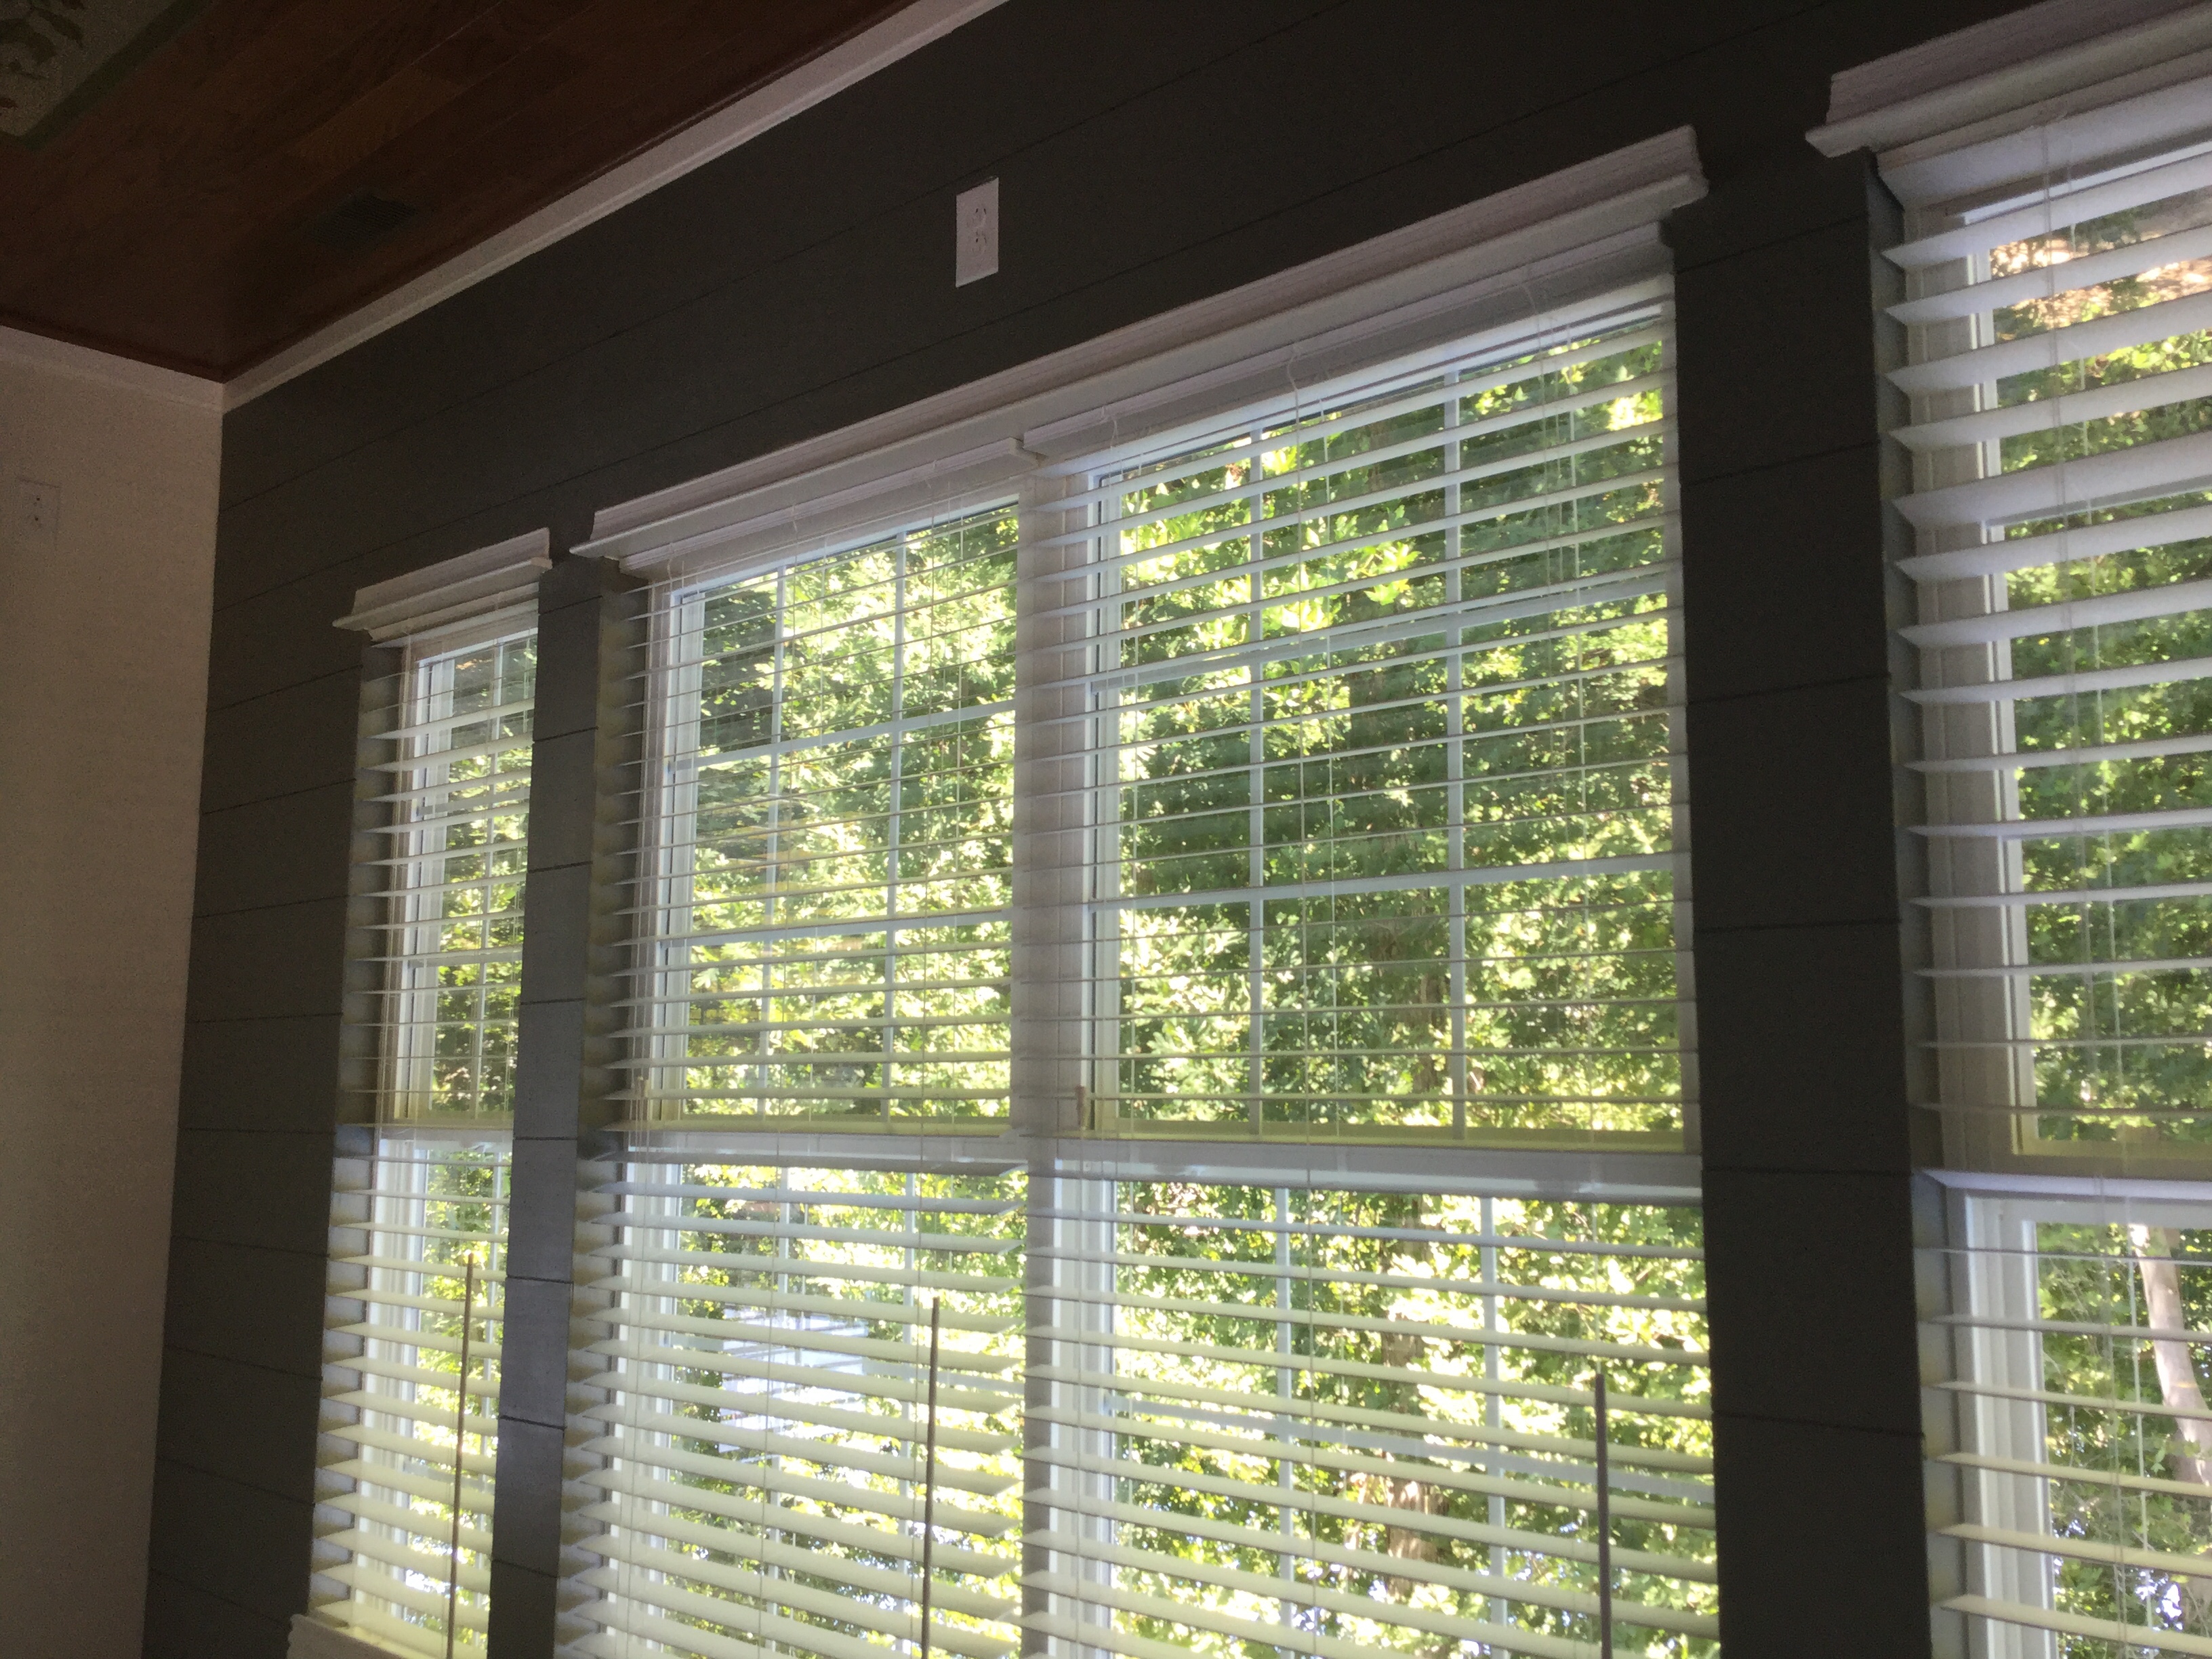
The process is very simple. Just get the boards and nail them onto the wall (in the studs). We started at the bottom by placing the first board on the baseboard already installed. Fortunately, it was very level so we were able to just use that without any cuts. Once that was installed, the next piece to the right was cut to fit the rest of the length of the wall with the table saw and nailed to the wall. Then we just nailed the planks up the wall. The space between the boards was accomplished by taping two quarters together (we made 3 of these). We placed the taped quarters about a foot or so apart to make sure the space was even all the way down the board. My husband used the jigsaw and the table saw to cut around the outlet and the windows. This was tough to do with the tools we had on hand. He did his best to get the cuts as close as possible and we ended up using wood putty to fill in the gaps. Once he reached the angled ceiling, he figured out the angle for each board (he had to do each board separately because the drywall on the ceiling warped and didn’t keep at the perfect angle all the up). He just used the table saw to cut at the appropriate angle. He continued to nail the boards up using the quarters as spacers.
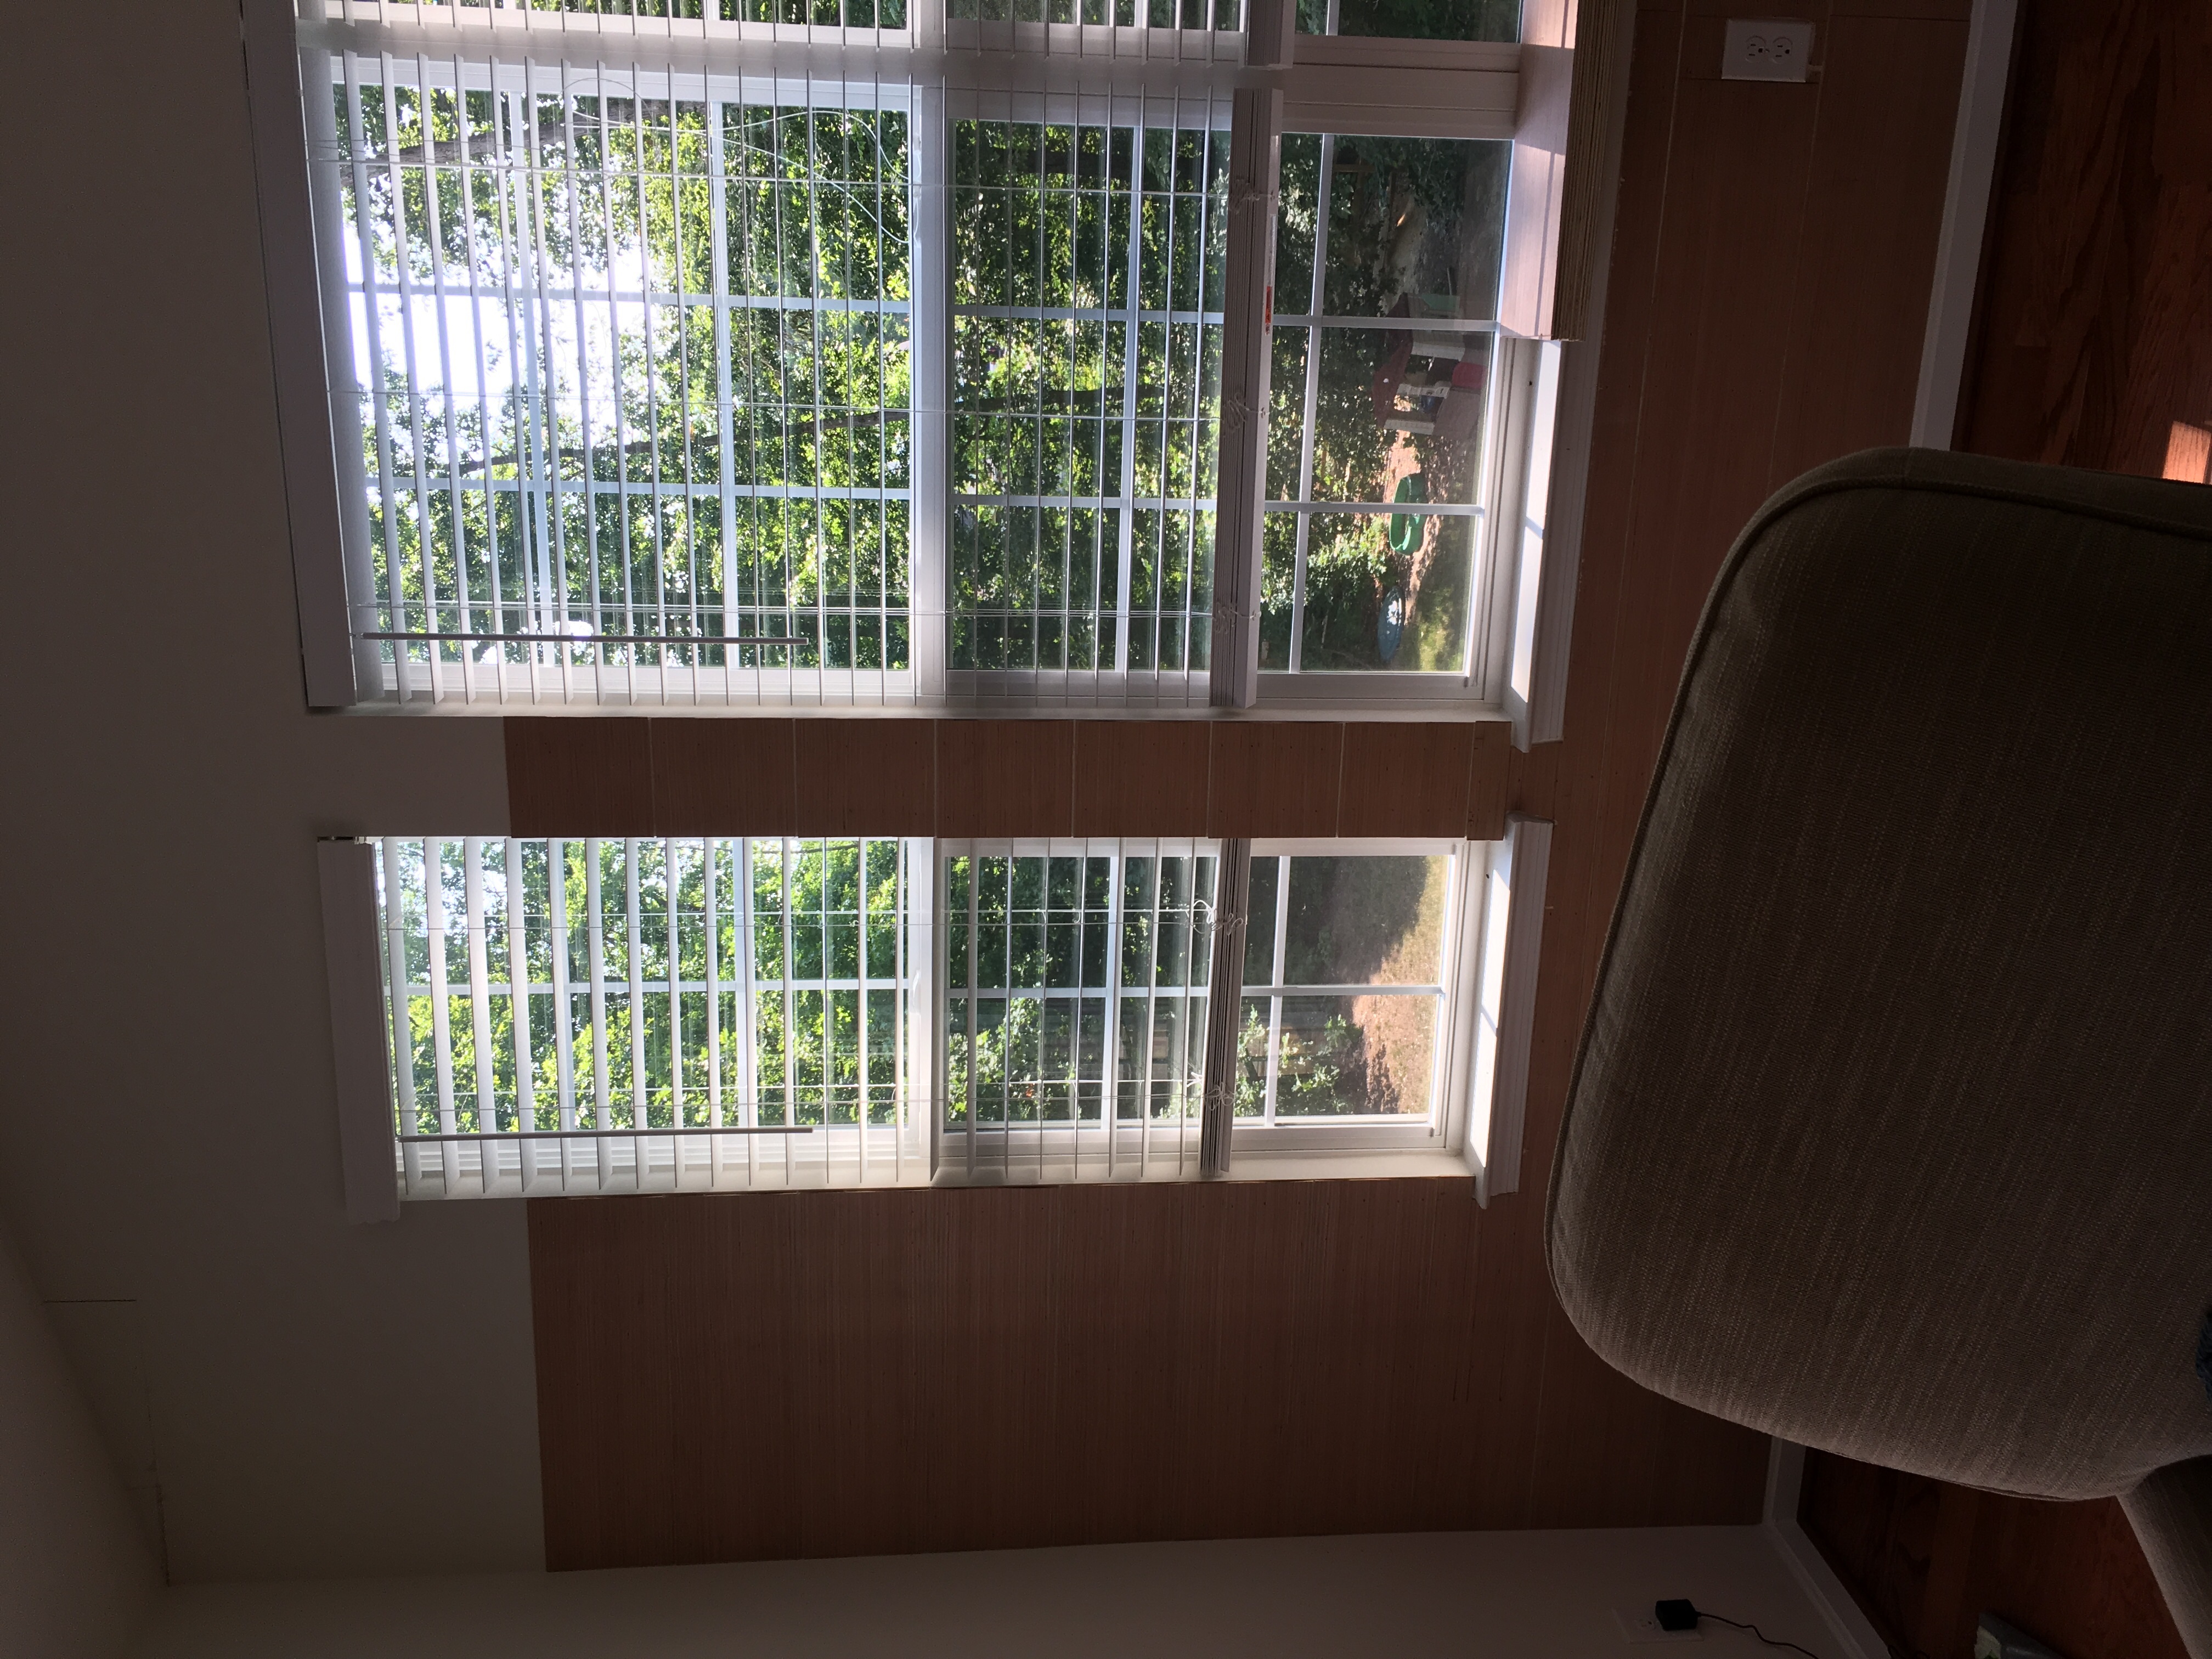
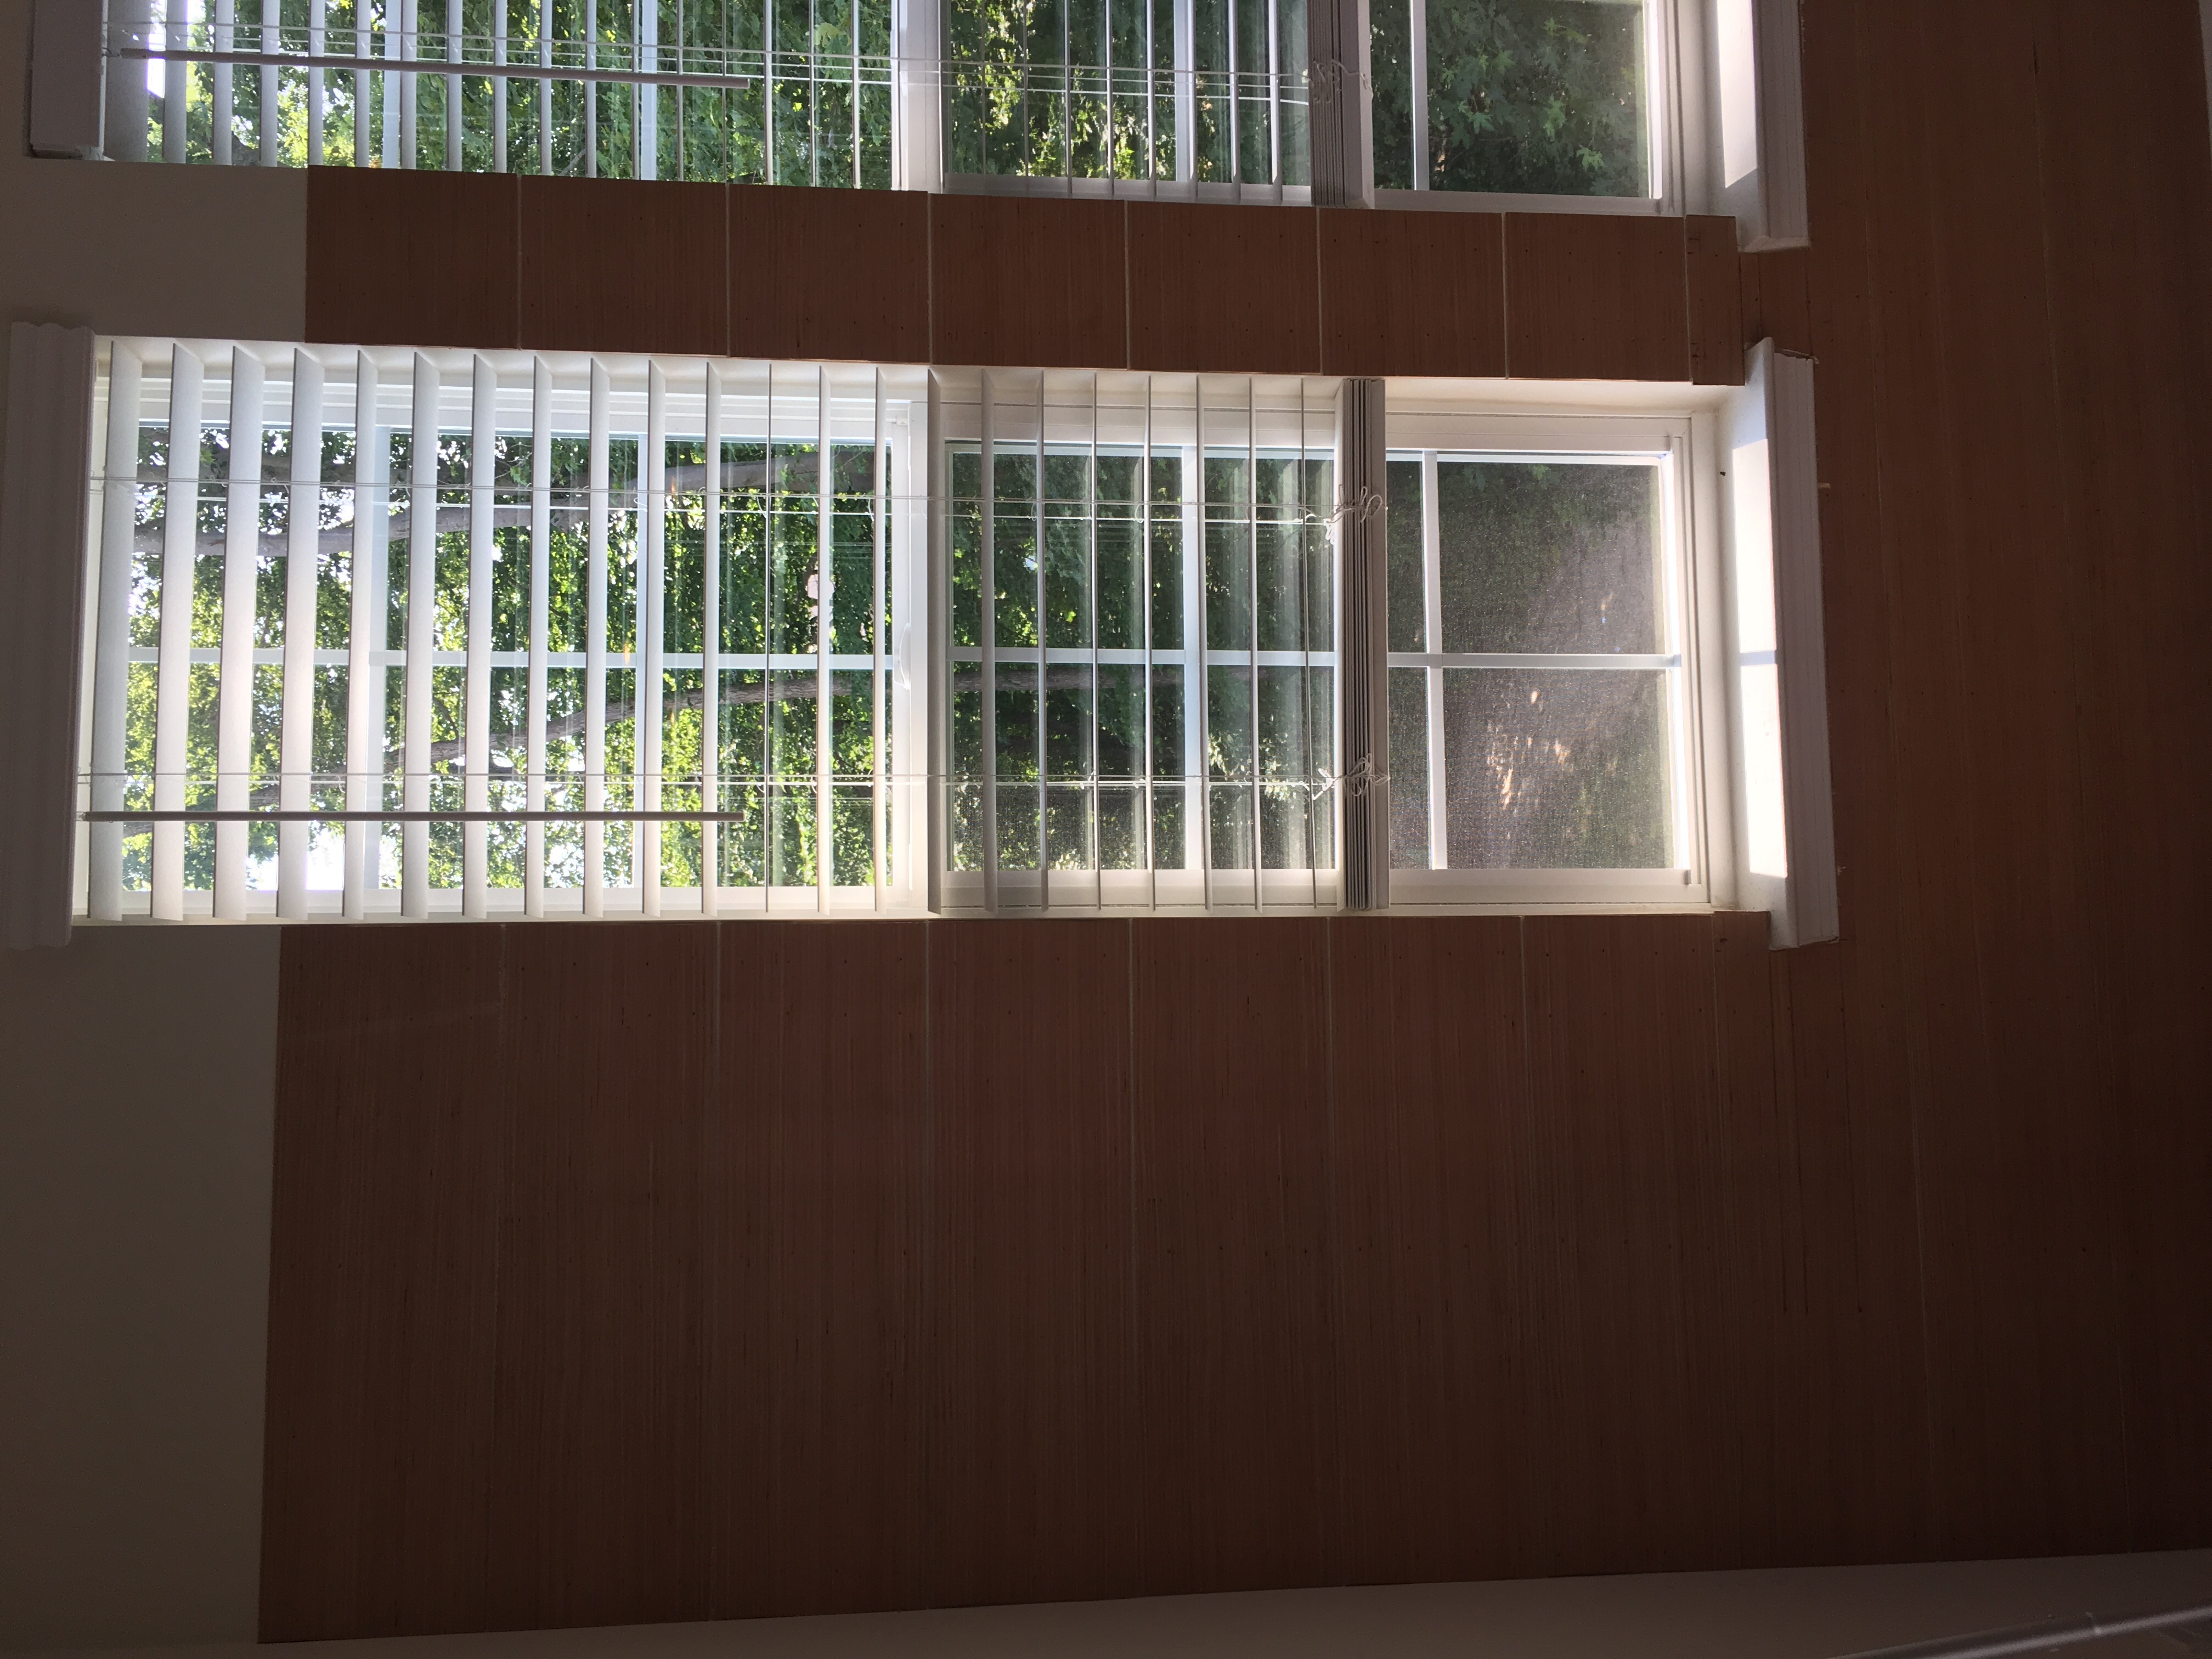
Once all the boards were on the wall, he used wood putty to smooth out the vertical gaps between the boards on the length of the wall so that it looked like one board all the way across the wall. On Pinterest, I saw that some people also covered the nail holes to make the board completely smooth. We elected NOT to do that so as to keep some of the rustic feel. I am glad we made this decision. As I mentioned above, my husband used wood putty to fill in the gaps around the windowsills and anywhere the angle was off between the board at the ceiling.
Once all the wood putty was sanded down smooth, we painted. We used Valspar in the Satin finish. It definitely took two coats but actually made the boards look thicker on the wall. Since we did not paint the wall behind the boards before we nailed the boards up on the wall, we had to take a thin paint brush to get between the gaps with the paint. I noticed on Pinterest that some people had painted the wall behind the boards to avoid the tedious task of painting between the gaps and even painted the edges of the boards. I think this is certainly a good idea. It is up to you though.
And that was all! It took a while to get the cuts right so we were glad we purchased extra plywood underlayment. Overall, the project was relatively easy and a definite success. We plan to do this on another wall or two as a panel or below chair rail.
When we do this again, we will do a few things differently:
1. Lightly sand the edge of each board before nailing it to the wall so that the edges are not jagged. It would make painting the gaps a breeze.
2. Pick a wall without windows and angled ceilings to make cuts easier (however, we are glad we did this wall because it turned out beautiful but it did take longer than expected because of the cuts and wood putty needed).
3. Remember that drywall will warp slightly so each board should be measured exactly for the space it will go into to ensure tight fits.
Below are some pictures I snapped of the process and the finished project. As you can see, once the plywood planks are painted, the gaps turn out more obvious and give the Shiplap look we were looking for. I am not a professional photographer, but trust me, these pictures do not do this wall justice. It looks far better in person than in my photos.